10 Tips for the perfect label print
A step-by-step guide
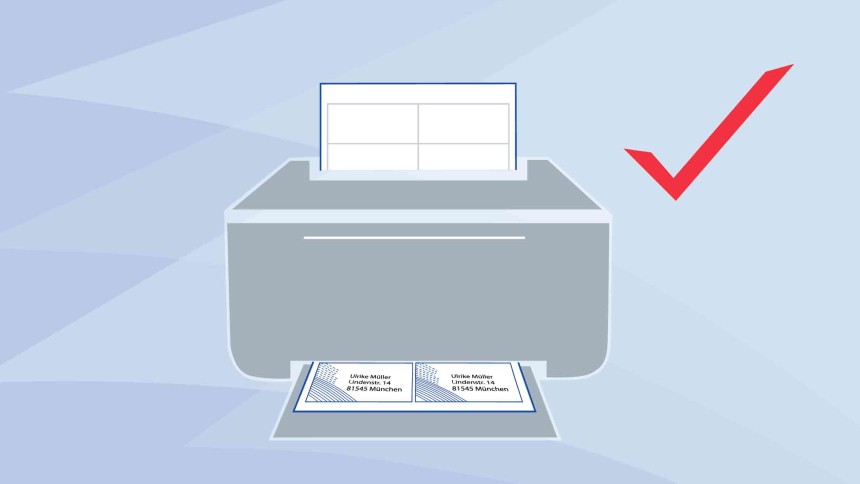
Labels act different in the printer compared to normal printing paper. Therefore we recommend to have below 10 facts in mind – it will only take a few minutes to read – but with this guide, you will be able to print your labels in the quickest and most professional way.

Step 1: Be sure of the quality of your labels.
Make sure that your labels are original Avery labels – with original Avery labels, you have the best possible quality.
- Trouble-free printer throughput is supported by the optimal flatness and the smooth surface of our labels.
- Your printer will be spared: Through the surrounded glue free edges on your Avery labels, glue deposits in your printer will be prevented.
- A very sharp print image without smearing is made possible by the excellent ink or toner anchoring.
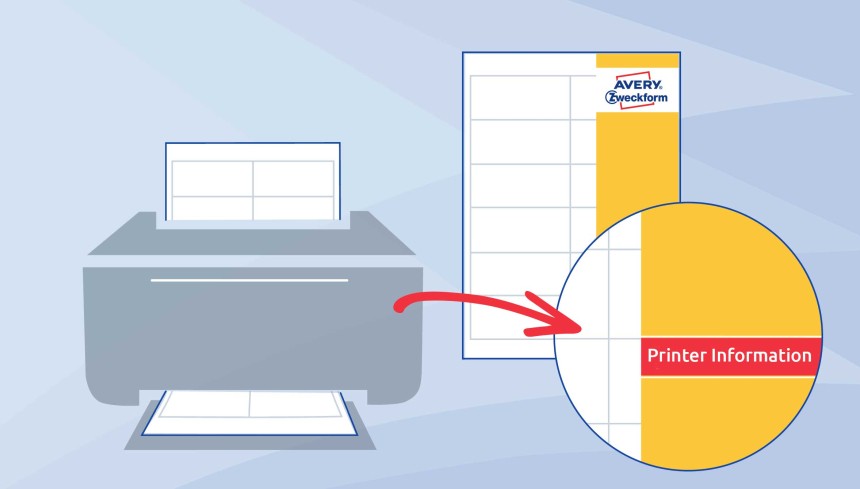
Step 2: Use the appropriate labels for your printer.
- Our Universal labels are printable with all kinds of printers.
- By special labels as address, textile or film labels please note the recommended printer type. Information about the recommended printer technology can be found on the front of your Avery pack and in the item description.
If you choose the wrong paper type for your printer you might risk that your print will not look good, that the paper will be wrinkled or in worst case, that a paper jam will occur.
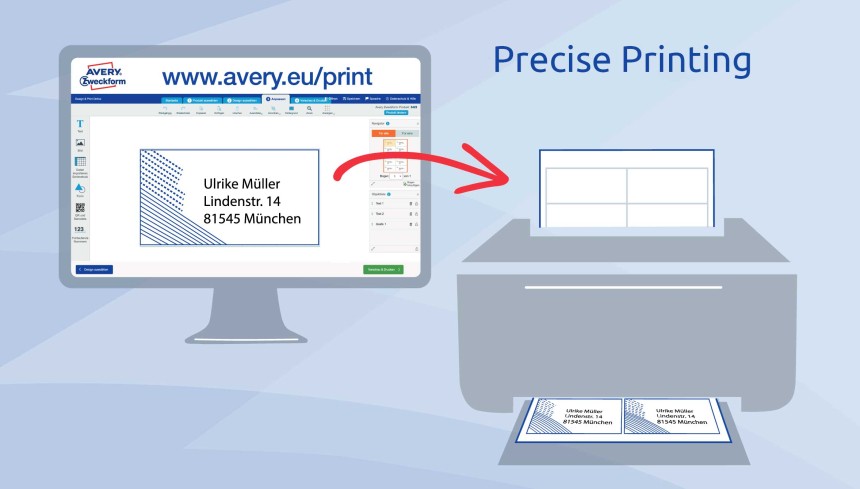
Step 3: For perfect and precise printing we recommend our template tool.
- When designing your label, please make sure that your text and design are placed with a small distance to the edge of the label. Not all printers enable a millimeter-precise printing.
- Use our free online tool Avery Design & Print with tailer-made templates and helpful functions such as the mail merge option. When designing your label, you will in the online software be guided how to reach the optimal printing.
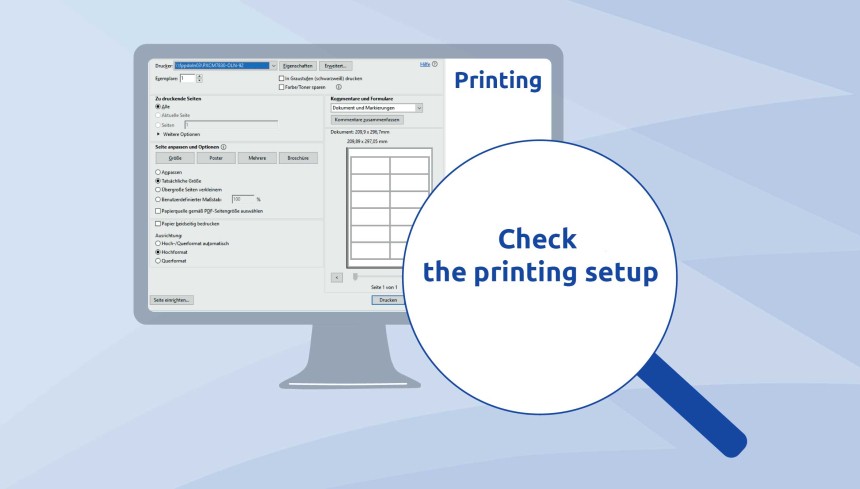
Step 4: Test your Printer setup.
- Choose the Labels setting from the printer menu. (Depending on the type of printer, there are alternative terms such as "cardboard" or "thick paper".) When choosing this setup the sheet is fed through the printer device more slowly, and the toner is fixed much better on your labels.
- Select the "plain paper" setting for inkjet printers. Otherwise, excessive ink application may occur.
We recommend to check the printers operating instructions for e.g. special settings when printing labels.
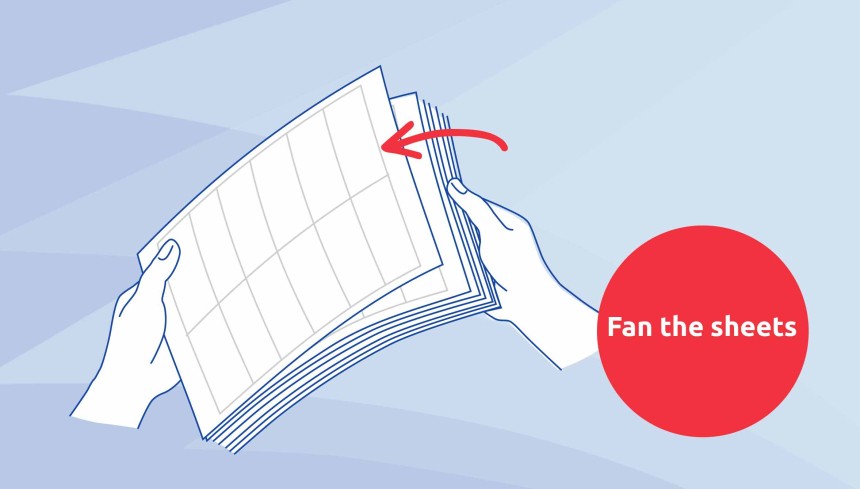
Step 5: Fan the labels before printing.
- Fan the sheets carefully before inserting the labels into the paper tray.
- This way, air gets between the individual sheets and they are drawn in individually.
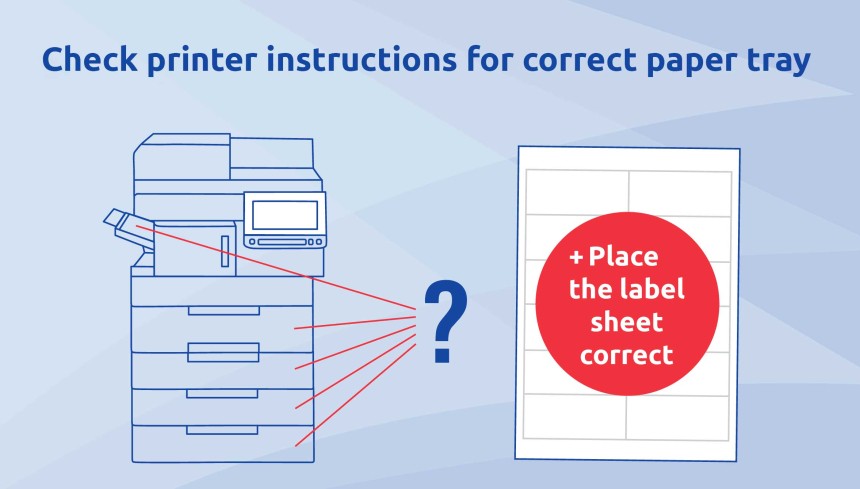
Step 6: Place the label sheets correct in the printer.
- Place the labels in the paper tray provided. You will find information on this in the operating instructions for your printer.
- On Avery label sheets the edge distance is the same on all sides, so you only have to pay attention to the front and the back. If you have chosen labels with special shape such as e.g. hearts or sealing – then the up/down direction of the sheet is naturally important.
- Visual markings on the printer show you how to load the sheet correctly.
- If your printer does not have a visual marking, then mark a blank sheet of paper, print on it and note which side is front and back.
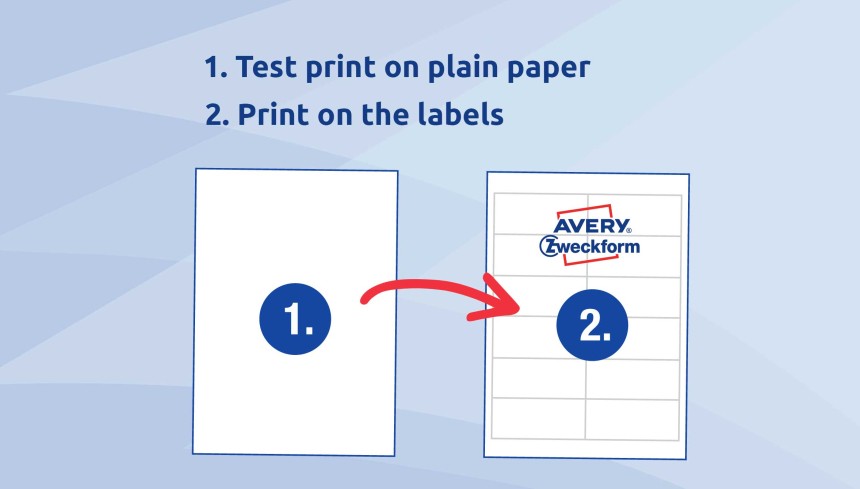
Step 7: Make a test print on plain paper.
- We recommend a test print on plain paper. Because your printer may print the print template a little differently than shown in the print preview.
- Lay the printed test on your sheet of labels and check against the light that everything is placed correctly.
- If necessary, correct the deviations manually in the Avery print template. It is usually sufficient to adjust the line spacing or the margins
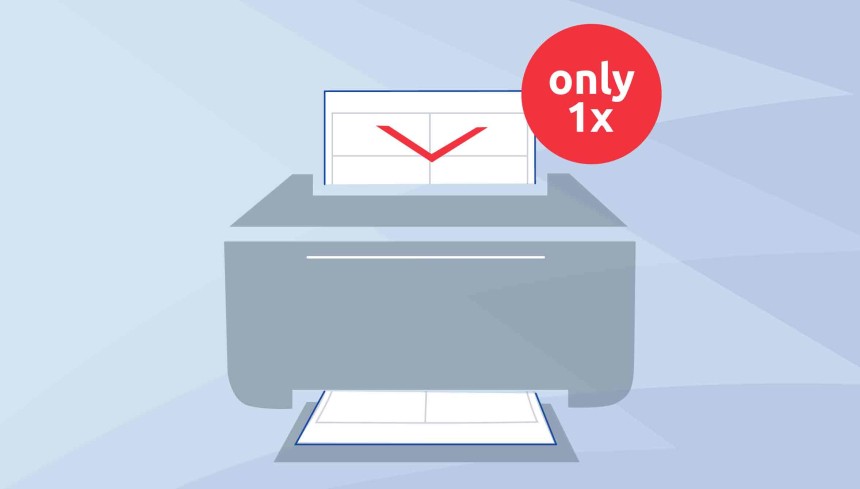
Step 8: The sheet of labels may only run through the printer once.
- We recommend that you do not put a sheet of labels that has already been (partially) printed into the printer again.
- The reason: The backing material has lost its rigidity when individual labels have been removed. As a result, labels may peel off in the printer or the sheet may become caught, causing a printer jam – or in worst case a label can stick to the printers feed drum etc.
"Our circumferential adhesive-free safety edge QCT (Quattro Clean Technology) is also interrupted by labels that have already been removed and can therefore no longer effectively prevent adhesive deposits in the printer – as described in step 1."
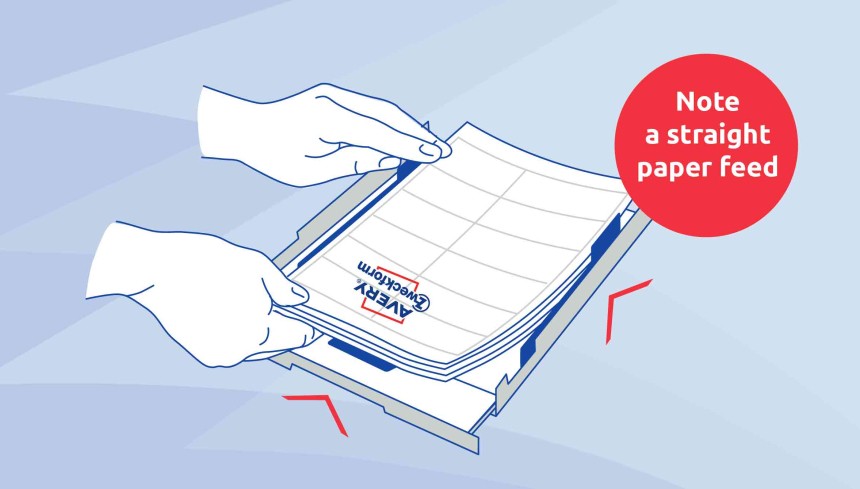
Step 9: Please note the following for optimal paper feed.
- Use the slide control for the paper feed and adjust it perfectly to the label sheet.
- If you are going to print multiple sheets of labels, do not fully load the paper tray. This allows your printer to feed in the sheets individually
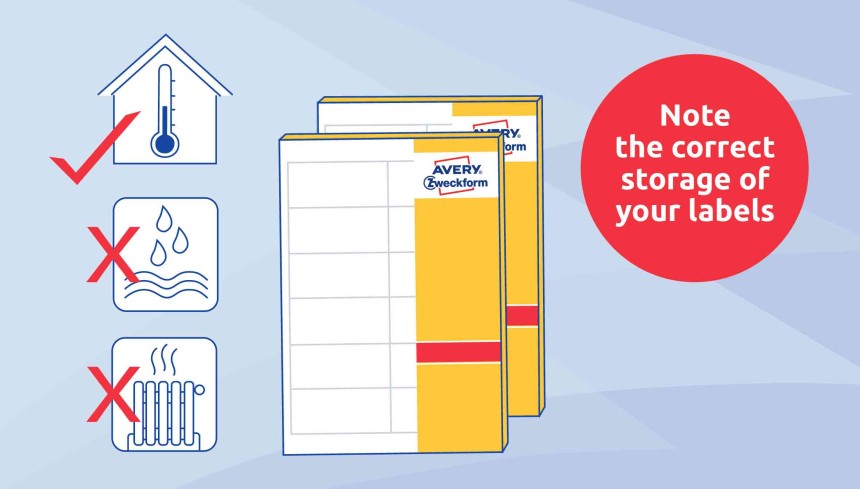
Step 10: Pay attention to the correct storage of your labels.
- Store the labels at room temperature in the original packaging.
- Protect your labels from moisture and direct sunlight and heat. Please do not store near heat sources (heating).
- Avoid strong temperature fluctuations. If the temperatures in your printer room are significantly different than in the storage room, it is best to let the labels acclimate for a day before printing.
- We recommend to store the labels in rooms with a humidity between 35-55% and a room temperature of 10-30%.